Angular4 Routing on VS 2017

This article will show how to configure Angular 4 Routing on an ASP.Net MVC web application

STEP 1 – Make sure you have installed the prerequisites

Without these requisites, application will not run.

  • Visual Studio 2017
  • TypeScript 2.0 for Visual Studio 2017

STEP 2 – Create ASP.NET MVC Web Application

Go to Visual StudioFile New Project menu, expand the Web category, and pick ASP.NET Web Application like on the image below

Select the template MVC:


STEP 3 – Configure Angular 4

We need now to prepare our frontend to run Angular 4

  • Create tsconfig.json which is the TypeScript compiler configuration file.
JavaScript
{ 
  "compilerOptions"{ 
    "target""es5", 
    "module""commonjs", 
    "moduleResolution""node", 
    "sourceMap": true, 
    "emitDecoratorMetadata": true, 
    "experimentalDecorators": true, 
    "lib": [ "es2015""dom" ], 
    "noImplicitAny": true, 
    "suppressImplicitAnyIndexErrors": true 
  } 
} 
  • Add package.json file to your project folder with the below code:

The most important things in your package.json are the name and version fields. Those are actually required, and your package won’t install without them. The name and version together form an identifier that is assumed to be completely unique. Changes to the package should come along with changes to the version.


JavaScript
{ 
  "name""angular-quickstart", 
  "version""1.0.0", 
  "description""QuickStart package.json from the documentation for visual studio 2017 & WebApi", 
  "scripts"{ 
    "start""tsc && concurrently \"tsc -w\" \"lite-server\" ", 
    "lint""tslint ./app/**/*.ts -t verbose", 
    "lite""lite-server", 
    "pree2e""webdriver-manager update", 
    "test""tsc && concurrently \"tsc -w\" \"karma start karma.conf.js\"", 
    "test-once""tsc && karma start karma.conf.js --single-run", 
    "tsc""tsc", 
    "tsc:w""tsc -w" 
  }, 
  "keywords": [], 
  "author""", 
  "license""MIT", 
  "dependencies"{ 
    "@angular/common""4.0.2", 
    "@angular/compiler""4.0.2", 
    "@angular/core""4.0.2", 
    "@angular/forms""4.0.2", 
    "@angular/http""4.0.2", 
    "@angular/platform-browser""4.0.2", 
    "@angular/platform-browser-dynamic""4.0.2", 
    "@angular/router""4.0.2", 
 
    "angular-in-memory-web-api""~0.2.4", 
    "systemjs""0.19.40", 
    "core-js""^2.4.1", 
    "rxjs""5.0.1", 
    "zone.js""^0.7.4" 
  }, 
  "devDependencies"{ 
    "concurrently""^3.2.0", 
    "lite-server""^2.2.2", 
    "typescript""~2.0.10", 
 
    "canonical-path""0.0.2", 
    "tslint""^3.15.1", 
    "lodash""^4.16.4", 
    "jasmine-core""~2.4.1", 
    "karma""^1.3.0", 
    "karma-chrome-launcher""^2.0.0", 
    "karma-cli""^1.0.1", 
    "karma-jasmine""^1.0.2", 
    "karma-jasmine-html-reporter""^0.2.2", 
    "protractor""~4.0.14", 
    "rimraf""^2.5.4", 
 
    "@types/node""^6.0.46", 
    "@types/jasmine""2.5.36" 
  }, 
  "repository"{} 
} 
  • Create a sub-folder app on the root folder. On this folder we need to create our typescript files:
    • main.ts
    • app.module.ts
    • app.component.ts
    • app.component.html
    • need to create also components to each route we need. On this example we need to create two components Roo1Component and Root2Component that must be declares on app.module.ts
  • Create your index.html file like showing below:


HTML
<!DOCTYPE html> 
<html<head    >document.write(' href="' + document.location + '" />'); 
    <title>Angular4 Routing</title> 
    <base href="/"    <meta charset="UTF-8"    <meta name="viewport" content="width=device-width, initial-scale=1"    <base href="/"    <link rel="stylesheet" href="styles.css" 
    <!-- load bootstrap 3 styles --> 
    <link href="https://maxcdn.bootstrapcdn.com/bootstrap/3.3.6/css/bootstrap.min.css" rel="stylesheet" 
 
    <!-- Polyfill(s) for older browsers --> 
     src="node_modules/core-js/client/shim.min.js"> 
     src="node_modules/zone.js/dist/zone.js"> 
     src="node_modules/systemjs/dist/system.src.js"> 
 
     src="systemjs.config.js"> 
            System.import('app/main.js').catch(function (err) { console.error(err); }); 
     
 
</head> 
<body    <my-app>Loading App</my-app> 
</body> 
</html> 
Angular will launch the app in the browser with our component and places it in a specific location on index.html.


STEP 5 – Run application

Resources

Angular4: https://angular.io/

My personal blog: https://joaoeduardosousa.wordpress.com/

Configure Angular4 with TypeScript on a WebApplication with VS 2017

This article will show how to configure Angular 4 and TypeScript in a ASP.Net MVC web application using Visual Studio 2017

STEP 1 – Make sure you have installed the prerequisites

Without these requisites, application will not run.

  • Visual Studio 2017
  • TypeScript 2.0 for Visual Studio 2017

STEP 2 – Create ASP.NET MVC Web Application

Go to Visual StudioFile New Project menu, expand the Web category, and pick ASP.NET Web Application like on the image below

Select the template MVC:


STEP 3 – Configure Angular 4

We need now to prepare our frontend to run Angular 4

  • Create tsconfig.json which is the TypeScript compiler configuration file.
JavaScript
{ 
  "compilerOptions"{ 
    "target""es5", 
    "module""commonjs", 
    "moduleResolution""node", 
    "sourceMap": true, 
    "emitDecoratorMetadata": true, 
    "experimentalDecorators": true, 
    "lib": [ "es2015""dom" ], 
    "noImplicitAny": true, 
    "suppressImplicitAnyIndexErrors": true 
  } 
} 
  • Add package.json file to your project folder with the below code:

The most important things in your package.json are the name and version fields. Those are actually required, and your package won’t install without them. The name and version together form an identifier that is assumed to be completely unique. Changes to the package should come along with changes to the version.


JavaScript
{ 
  "name""angular-quickstart", 
  "version""1.0.0", 
  "description""QuickStart package.json from the documentation for visual studio 2017 & WebApi", 
  "scripts"{ 
    "start""tsc && concurrently \"tsc -w\" \"lite-server\" ", 
    "lint""tslint ./app/**/*.ts -t verbose", 
    "lite""lite-server", 
    "pree2e""webdriver-manager update", 
    "test""tsc && concurrently \"tsc -w\" \"karma start karma.conf.js\"", 
    "test-once""tsc && karma start karma.conf.js --single-run", 
    "tsc""tsc", 
    "tsc:w""tsc -w" 
  }, 
  "keywords": [], 
  "author""", 
  "license""MIT", 
  "dependencies"{ 
    "@angular/common""4.0.2", 
    "@angular/compiler""4.0.2", 
    "@angular/core""4.0.2", 
    "@angular/forms""4.0.2", 
    "@angular/http""4.0.2", 
    "@angular/platform-browser""4.0.2", 
    "@angular/platform-browser-dynamic""4.0.2", 
    "@angular/router""4.0.2", 
 
    "angular-in-memory-web-api""~0.2.4", 
    "systemjs""0.19.40", 
    "core-js""^2.4.1", 
    "rxjs""5.0.1", 
    "zone.js""^0.7.4" 
  }, 
  "devDependencies"{ 
    "concurrently""^3.2.0", 
    "lite-server""^2.2.2", 
    "typescript""~2.0.10", 
 
    "canonical-path""0.0.2", 
    "tslint""^3.15.1", 
    "lodash""^4.16.4", 
    "jasmine-core""~2.4.1", 
    "karma""^1.3.0", 
    "karma-chrome-launcher""^2.0.0", 
    "karma-cli""^1.0.1", 
    "karma-jasmine""^1.0.2", 
    "karma-jasmine-html-reporter""^0.2.2", 
    "protractor""~4.0.14", 
    "rimraf""^2.5.4", 
 
    "@types/node""^6.0.46", 
    "@types/jasmine""2.5.36" 
  }, 
  "repository"{} 
} 


  • Create a sub-folder app on the root folder. On this folder we need to create our typescript files:
    • main.ts
    • app.module.ts
    • app.component.ts
    • app.component.html
  • Create your index.html file like showing below:


HTML
<!DOCTYPE html> 
<html<head    >document.write(' href="' + document.location + '" />'); 
    <title>Angular4 Routing</title> 
    <base href="/"    <meta charset="UTF-8"    <meta name="viewport" content="width=device-width, initial-scale=1"    <base href="/"    <link rel="stylesheet" href="styles.css" 
    <!-- load bootstrap 3 styles --> 
    <link href="https://maxcdn.bootstrapcdn.com/bootstrap/3.3.6/css/bootstrap.min.css" rel="stylesheet" 
 
    <!-- Polyfill(s) for older browsers --> 
     src="node_modules/core-js/client/shim.min.js"> 
     src="node_modules/zone.js/dist/zone.js"> 
     src="node_modules/systemjs/dist/system.src.js"> 
 
     src="systemjs.config.js"> 
            System.import('app/main.js').catch(function (err) { console.error(err); }); 
     
 
</head> 
<body    <my-app>Loading App</my-app> 
</body> 
</html> 
Angular will launch the app in the browser with our component and places it in a specific location on index.html.


STEP 5 – Run application

Resources

Angular4: https://angular.io/

ASP.NET Core – How to configure Angular2 with TypeScript

This article will show how to configure Angular 2 and TypeScript in a ASP.Net Core based API

Download code here: https://code.msdn.microsoft.com/ASPNET-Core-How-to-feb8d5ff/view/Reviews

STEP 1 – Make sure you have installed the prerequisites

Without these requisites, application will not run.

STEP 2 – Create ASP.NET Core Web Application

Go to Visual StudioFile New Project menu, expand the Web category, and pick ASP.NET Core Web Application like on the image below

Select the template Web API:


STEP 3 – Prepare Web Application to run Angular 2

At this point, we have our backend part ready. Let’s setup the frontend.

A Web API project can’t serve static files like JavaScripts, CSS styles, images, or even HTML files. Therefore we need to add a reference to Microsoft.AspNetCore.StaticFiles in the project.json:

  • “Microsoft.AspNetCore.StaticFiles”: “1.0.0 “,

And in the startup.cs, we need to add the following line, just before the call of UseMvc().

  • app.UseStaticFiles();

Another important thing we need to do in the startup.cs is to support the Routing of Angular 2. If the Browser calls a URL that doesn’t exist on the server, it could be an Angular route. Especially if the URL doesn’t contain a file extension.

Just before we call UseStaticFiles() insert the following code:

C#
app.Use(async (context, next) => 
{ 
    await next(); 
 
    if (context.Response.StatusCode == 404 
        && !Path.HasExtension(context.Request.Path.Value)) 
    { 
        context.Request.Path = "/index.html"; 
        await next(); 
    } 
}); 
 

STEP 4 – Configure Angular 2


Now we prepared the ASP.NET Core application to start to follow the angular.io tutorial.

  • You need to create tsconfig.json which is the TypeScript compiler configuration file. It guides the compiler to generate JavaScript files.
C#
{ 
  "compilerOptions": { 
    "target""es5", 
    "module""system", 
    "moduleResolution""node", 
    "sourceMap"true, 
    "emitDecoratorMetadata"true, 
    "experimentalDecorators"true, 
    "removeComments"false, 
    "noImplicitAny"false 
  }, 
  "exclude": [ 
    "node_modules", 
    "typings/main", 
    "typings/main.d.ts" 
  ] 
 
} 
 
  •  Create a typings.json file in your project folder angular2-demo as shown below:
C#
{ 
  "globalDependencies": { 
    "core-js""registry:dt/core-js#0.0.0+20160602141332", 
    "jasmine""registry:dt/jasmine#2.2.0+20160621224255", 
    "node""registry:dt/node#6.0.0+20160621231320" 
  } 
}
  • Add package.json file to your project folder with the below code:
C#
package.json 
{ 
  "name""angular2-demo", 
  "version""1.0.0", 
  "scripts": { 
    "start""concurrent \"npm run tsc:w\" \"npm run lite\" ", 
    "tsc""tsc", 
    "tsc:w""tsc -w", 
    "lite""lite-server", 
    "typings""typings", 
    "postinstall""typings install" 
  }, 
  "license""ISC", 
  "dependencies": { 
    "angular2""2.0.0-beta.7", 
    "systemjs""0.19.22", 
    "es6-promise""^3.0.2", 
    "es6-shim""^0.33.3", 
    "reflect-metadata""0.1.2", 
    "rxjs""5.0.0-beta.2", 
    "zone.js""0.5.15" 
  }, 
  "devDependencies": { 
    "concurrently""^2.0.0", 
    "lite-server""^2.1.0", 
    "typescript""^1.7.5", 
    "typings":"^0.6.8" 
  } 
}
The package.json will contain the packages that our apps require. These packages are installed and maintained with npm (Node Package Manager). To install packages, run the below npm command in command prompt.

Create a sub-folder called app/ inside your wwwroot project folder to the place Angular app components.

The files which you create need to be saved with .ts extension. Create a file called environment_app.component.ts in your app/ folder with the below code:

C#
environment_app.component.ts 
 
import {Component, View} from "angular2/core"; 
 
@Component({ 
   selector: 'my-app' 
}) 
 
@View({ 
  template: '<h2>My First Angular 2 App</h2>' 
}) 
 
export class AppComponent { 
} 
 
Next, create environment_main.ts file with the below code:
C#
import {bootstrap} from "angular2/platform/browser" 
import {AppComponent} from "./environment_app.component" 
 
bootstrap(AppComponent); 
 
The environment_main.ts file tells Angular to load the component.
  • Now create a index.html in your project folder angular2demo/ with the below code:
C#
<!DOCTYPE html> 
<html> 
  <head> 
    <title>Hello World</title> 
    "https://cdnjs.cloudflare.com/ajax/libs/es6-shim/0.33.3/es6-shim.min.js"> 
    "https://cdnjs.cloudflare.com/ajax/libs/systemjs/0.19.20/system-polyfills.js"> 
    "https://code.angularjs.org/2.0.0-beta.6/angular2-polyfills.js"> 
    "https://code.angularjs.org/tools/system.js"> 
    "https://code.angularjs.org/tools/typescript.js"> 
    "https://code.angularjs.org/2.0.0-beta.6/Rx.js"> 
    "https://code.angularjs.org/2.0.0-beta.6/angular2.dev.js"> 
     
 
      System.config({ 
        transpiler: 'typescript', 
        typescriptOptions: { emitDecoratorMetadata: true }, 
        packages: {'app': {defaultExtension: 'ts'}} 
      }); 
 
      System.import('/app/environment_main') 
            .then(null, console.error.bind(console)); 
     
  </head> 
<body> 
   <my-app>Loading...</my-app> 
</body> 
</html>
Angular will launch the app in the browser with our component and places it in a specific location on index.html.

STEP 5 – Run application

Resources

Angular2: http://www.angular2.com/

ASP.NET Core 1.0 – Enable Minification

To enable minification, ensure the following:
1. Config.asax, register the BundlesConfig
protected void Application_Start()

{
         BundlesConfig.RegisterBundles(BundleTable.Bundles);
}

2. BundleConfig.cs, include the scripts and enable optimizations
public static void RegisterBundles(BundleCollection bundles)

{
  bundles.Add(new ScriptBundle("~/bundles/jquery").Include(
    "~/Scripts/jquery-{version}.js"));
BundleTable.EnableOptimizations = true;
}

3. main.html, register the scripts

@section scripts {
       @Scripts.Render("~/bundles/jquery")
}

4. In addition the minification process changes $scope and $q into random variables. Since this does nto tell angular what to inject, the solution is to declare your dependencies wrapped in []:
angular.module("MyApp")

       .controller("MyCtrl", ["$scope", "$q", function($scope, $q) {
  // your code
}])


This is just the steps you need to enable minification.

Include WebAPI to an existent project with ASP.NET MVC

If you have a new project and wan’t to create a project with MVC and WebAPI together, you just need to select the correct template on Visual Studio.
But and if you already have an MVC project and wan’t to include an WebAPI on the same project. How can you do that?

1. Add reference to 
System.Web.Http.WebHost.
2. Add App_Start\WebApiConfig.cs (see code snippet below).
3. Import namespace System.Web.Http in Global.asax.cs.
4. Call WebApiConfig.Register(GlobalConfiguration.Configuration) in MvcApplication.Application_Start() (in file Global.asax.cs), before registering the default Web Application route as that would otherwise take precedence.
5. Add a controller deriving from System.Web.Http.ApiController.


I could then learn enough from 
the tutorial  (Your First ASP.NET Web API) to define my API controller.

App_Start\WebApiConfig.cs:

using System.Web.Http;
class WebApiConfig
{
    public static void Register(HttpConfiguration configuration)
    {
        configuration.Routes.MapHttpRoute("API Default", "api/{controller}/{id}",
            new { id = RouteParameter.Optional });
    }
}

Global.asax.cs:

using System.Web.Http;
...
protected void Application_Start()
{
    AreaRegistration.RegisterAllAreas();
RegisterGlobalFilters(GlobalFilters.Filters);
    WebApiConfig.Register(GlobalConfiguration.Configuration);
    RegisterRoutes(RouteTable.Routes);
    BundleConfig.RegisterBundles(BundleTable.Bundles);
}


The NuGet package Microsoft.AspNet.WebApi must be installed for the above to work.

ASP.NET Core 1.0 – Configure Application Insights

This article will show how to integrate Microsoft Azure Application .Insights into a web application using ASP.NET Core 1.0 to Detect, triage, and diagnose issues in your web application

This article will show how to integrate Microsoft Azure Application .Insights into a web application using ASP.NET Core 1.0 to Detect, triage, and diagnose issues in your web application

Visual Studio Application Insights   monitors your live application to help you detect and diagnose performance issues and exceptions, and discover how your app is used. It can be used with a wide variety of application types. It works for apps that are hosted on your own on-premises IIS servers or on Azure VMs, as well as Azure web apps.

Download source – 2 MB

STEP1 – Create Azure Account

You need to get a Windows Azure account. Everyone can open a Windows Azure account for free.

Check the link below for more information.

http://www.windowsazure.com/en-us/pricing/free-trial/ 

STEP 2 – Create a new Application Insight into your Azure Account

After authentication, select new resource, and choose the option Monitoring + Management

A new tab will be open.

Choose the option Application Insight


It will appear a new window, to configure this resource has you can check on the image below

On the field Name set your ApplicationInsight configuration Name. On my case it will be called Demo.
Select the application Type, on our demo it will be ASP.NET Web Application.

After select all options, select the button Create.

This resource will be created on the subscription selected and it will be displayed

STEP 3 – Create ASP.NET Core Web Application

 Using the Application Insights, it will be necessary create the project ASP.NET Core Web Application

Select the template Web Application on ASP.NET 5 Templates:

Add nuget package Microsoft.ApplicationInsights.AspNetCore to solution

STEP 4 – Configure Application Insights into your Web Application

 After install the package we should configure the key from the resource created on Azure Portal.

For that select the file appsettings.json on your solution.

Go to the Azure Portal into the Demo Application Insight created and check the settings like on image below:

Open the appsettings.json file and copy your instrumentation key from Azure portal

We also need to change our Startup class like this:

C#

using System; 
 
using System.Collections.Generic; 
 
using System.Linq; 
 
using System.Threading.Tasks; 
 
using Microsoft.AspNetCore.Builder; 
 
using Microsoft.AspNetCore.Hosting; 
 
using Microsoft.Extensions.Configuration; 
 
using Microsoft.Extensions.DependencyInjection; 
 
using Microsoft.Extensions.Logging; 


namespace AppInsightsDemo 
 
{ 
 
    public class Startup 
 
    { 
 
        public Startup(IHostingEnvironment env) 
 
        { 
 
            var builder = new ConfigurationBuilder() 
 
                .SetBasePath(env.ContentRootPath) 
 
                .AddJsonFile("appsettings.json", optional: true, reloadOnChange: true) 
 
                .AddJsonFile($"appsettings.{env.EnvironmentName}.json", optional: true) 
 
                .AddEnvironmentVariables(); 


            if (env.IsDevelopment()) 
 
            { 
 
                // This will push telemetry data through Application Insights pipeline faster, allowing you to view results immediately. 
 
                builder.AddApplicationInsightsSettings(developerMode: true); 
 
            } 
 
            Configuration = builder.Build(); 
 
        } 


        public IConfigurationRoot Configuration { get; } 


        // This method gets called by the runtime. Use this method to add services to the container. 
 
        public void ConfigureServices(IServiceCollection services) 
 
        { 
 
            // Add framework services. 
 
            services.AddApplicationInsightsTelemetry(Configuration); 


            services.AddMvc(); 
 
        } 


        // This method gets called by the runtime. Use this method to configure the HTTP request pipeline. 
 
        public void Configure(IApplicationBuilder app, IHostingEnvironment env, ILoggerFactory loggerFactory) 
 
        { 
 
            loggerFactory.AddConsole(Configuration.GetSection("Logging")); 
 
            loggerFactory.AddDebug(); 


            app.UseApplicationInsightsRequestTelemetry(); 


            if (env.IsDevelopment()) 
 
            { 
 
                app.UseDeveloperExceptionPage(); 
 
                app.UseBrowserLink(); 
 
            } 
 
            else 
 
            { 
 
                app.UseExceptionHandler("/Home/Error"); 
 
            } 


            app.UseApplicationInsightsExceptionTelemetry(); 


            app.UseStaticFiles(); 


            app.UseMvc(routes => 
 
            { 
 
                routes.MapRoute( 
 
                    name: "default", 
 
                    template: "{controller=Home}/{action=Index}/{id?}"); 
 
            }); 
 
        } 
 
    } 
 

STEP 5 – Test Web Application

To test the integration of Application Insights into our application, just need to run it.

The collect of information, will start immediately.


Resources

Application Insights: https://www.visualstudio.com/products/application-insights-vs 

My personal blog: https://joaoeduardosousa.wordpress.com/

ASP.NET 5 – Connect to SQL Azure Database

Introduction

Using MVC, Entity Framework, ASP.NET5 Scaffolding, and Azure SQLServer you can create a web application that stores your information on an SQL Azure database. This demo shows you how to create a web application with MVC and Entity Framework 7, that communicate with a SQL Azure database.


STEP 1 – Create Azure Account

You need to get a Windows Azure account. Everyone can open a Windows Azure account for free.

Check the link below for more information.

http://www.windowsazure.com/en-us/pricing/free-trial/
STEP 2 – Create SQL Database on Windows Azure

After get access to an Azure Account, we need to create a SQL Database to store your data.

So for that we need to select the option New on the left bottom of our web page and then select the option Data + Storage -> SQL Database-> Set the name and provide the configurations you need.

On this case our SQL Database will have the name “SQLDemoAzure”.

After created the SQL Database, we need to get the connection string that will be used on Web Aplication to access the Azure SQL Database.

For that, select the databse created and on the main window, on the right side, we have an option called “Show Connection String”.

When we select that option, a new tabwill appear, like the following image, with the connection string formatted to different providers.


STEP 3 – Create ASP.NET 5 Web Application

  • Open Visual Studio 2015 and create a new project of type ASP.NET 5 Web Application.
  • On this project I create a solution called Demo.

  • Press OK, and a new screen will appear, with several options of template to use on our project.
  • Select the option MVC.


After selection of our template, your first web application using ASP.NET 5 is created.


STEP 4 – Create Data Model

After we have our web application created, we need to ceate our data model.

For that, select the option Add New Item on solution and choose the option Class. Create the class like the one on the image above.

STEP 5 – Scaffolding


This could be made easily using the Scaffolding functionality.

On the solution on the top of controller folder, select the option Add New Scaffold Item.

On the new screen, select the option MVC6 Controller with views using entity framework.


Select the name of the controller, class model and data context class.

The new controllers and views associated, was created with sucess.


STEP 6 – Change Connection String

For that just copy your database connection string, as explain on step1 and past into appsettings.json file.

STEP 7 – Change Menu Layout

To test the two tables, we can add two new entries on the web application menu.


STEP 8 – Run Application

Press now the F5 button, to run the web application.

The new entities appear on the menu.


Press the option car to see our entiity in action

Checking the database, you can see the table corresponding to the entity created and the data inserted.

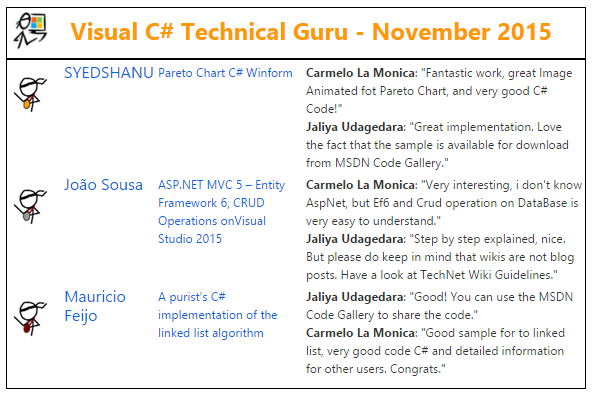
Microsoft TechNet Guru Awards November 2015

New award

http://blogs.technet.com/b/wikininjas/archive/2015/12/18/the-technet-guru-awards-november-2015.aspx

Capture.PNG

ASP.NET 5 – Create Web Application Step by Step

Introduction

Using MVC, Entity Framework, ASP.NET Scaffolding you can create a web application that stores your information. This demo shows you how to create a ASP.NET 5 web application with MVC and Entity Framework 7.

STEP 1 – Create ASP.NET 5 Web Application

  • Open Visual Studio 2015 and create a new project of type ASP.NET 5 Web Application.
  • On this project I create a solution called Demo.

  • Press OK, and a new screen will appear, with several options of template to use on our project.
  • Select the option MVC.

After selection of our template, your first web application using ASP.NET 5 is created.


STEP 2 – Create Data Model

After we have our web application created, we need to ceate our data model.

For that, select the option Add New Item on solution and choose the option Class. Create the class like the one on the image above.


STEP 3 – Scaffolding

This could be made easily using the Scaffolding functionality.

On the solution on the top of controller folder, select the option Add New Scaffold Item.


On the new screen, select the option MVC6 Controller with views using entity framework.


Select the name of the controller, class model and data context class.

The new controllers and views associated, was created with sucess.


STEP 4 – Change Menu Layout

To test the two tables, we can add two new entries on the web application menu.


STEP 5 – Run Application

Press now the F5 button, to run the web application.

The new entities appear on the menu.

Press the option car to see our entiity in action

An message error will appear sayng that the entity doesn’t exists on internal database and that we need to create it using some commands on package manager console.

Execute the commands like on the image above na try again

An thats it! Now its working

Resources:
Code – https://code.msdn.microsoft.com/ASPNET-5-Create-Web-b8a44cce

Congratulations João Sousa, our new Microsoft MVP

DevScope's Blog

NET-MVP-Joao-Sousa-DevScope

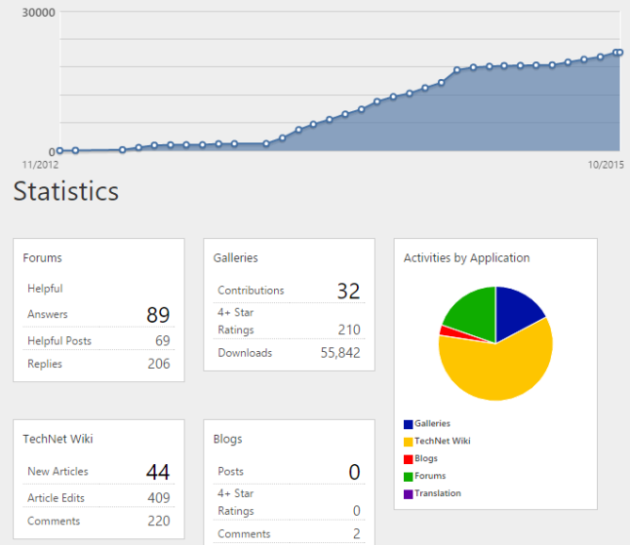
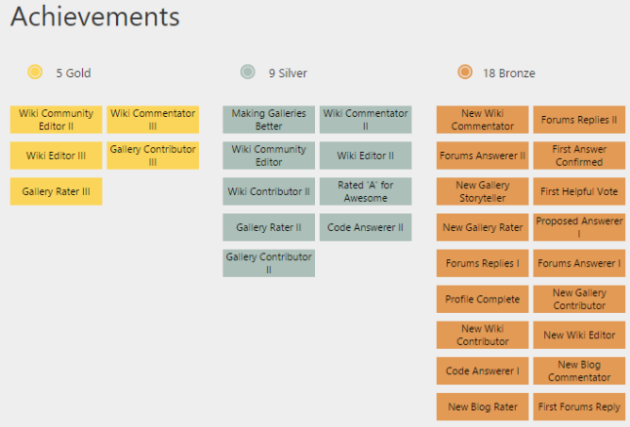
It is with great pleasure to announce that we have a new Microsoft Most Valuable Professional (MVP) among our team. The Microsoft MVP Award is an annual award that recognizes exceptional technology community leaders worldwide who actively share their knowledge, real world expertise, and will to help others.

“MVP have been an essential part of Microsoft and Microsoft culture for many years. They are more than fans; they are educators, advocates and above all, they are community leaders.”

Scott Guthrie, Executive Vice President, Microsoft Cloud and Enterprise Group

The road to João’s recognition included:

NET-MVP-Joao-Sousa-DevScope-contributionsNET-MVP-Joao-Sousa-DevScope-contributions-2

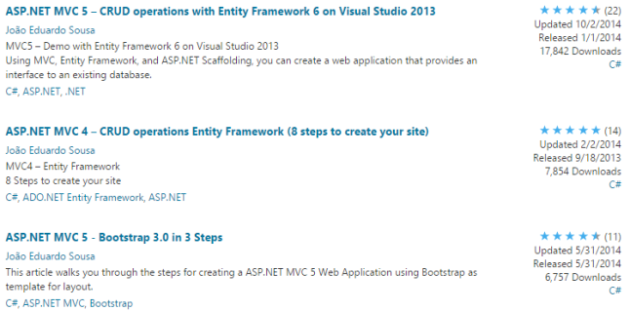
  • Code Gallery: Check all João’s contributions here

NET-MVP-Joao-Sousa-DevScope-contributions-3

  • TechNet Gallery: Check all his contributions here

NET-MVP-Joao-Sousa-DevScope-contributions-4

It takes two, or more…

This will be his first year in the MVP program and we are thrilled to have two…

View original post 240 more words